Way back in our Cubicle Days a friend and fellow gardener who now resides in New Mexico (Hi, Kim!) and I would fill the tedious hours by co-writing silly stories about our esteemed work colleagues. Strangely, they were all garden themed mysteries featuring someone sporting a trench coat stalking mist in a dark alley and the sudden flash of a street light off the gleaming steel blade of a hand-forged trowel. Good times!
Even though we now live many states apart and garden in completely different zones, the tradition continues as the following gardening song, composed via an e-mail exchange, will attest:
A Few of My Least Favorite Things
(to the tune of The Sound of Music's "My Favorite Things")
Aphids on roses and flea bites on kittens
White powder mildew and no shade for sittin'
Brown dried up grape vines all tied up with string
These are a few of my least favorite things.
Cream colored Peonies with crude hacker slashes
Pollen that tickles my nose and eyelashes
Silver white winters that last clear through spring
These are a few of my lease favorite things.
Garden designs that look like wild doodles
Late frost and hoar-frost on plants they are brutal
Canada geese that eat all my seedlings
These are a few of my least favorite things.
When the ticks bite, when the bees sting,
When I'm feeling sad, I remember my least favorite things
and then I really feel so bad!
If this horticulture thing doesn't work out, maybe there's a future in the songwriting business? Right. Perhaps I'll just stick with my day job!
18 April 2010


17 April 2010
The true harbinger of spring is not crocuses or cherry blossoms, but the chuff of a spade in the soil
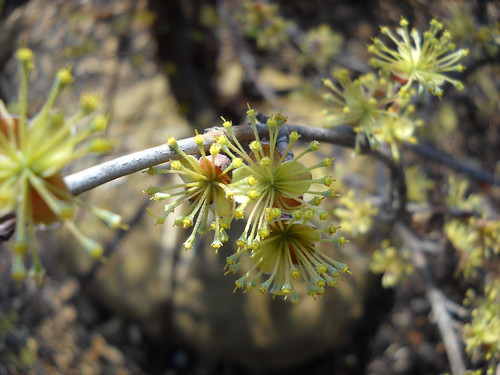
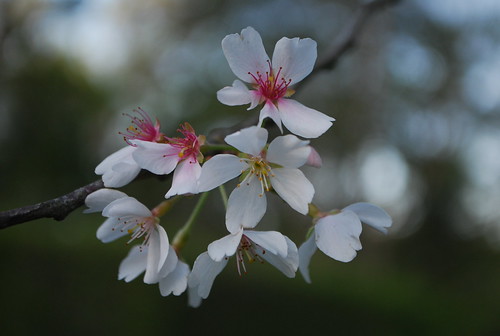
After a record-breaking winter and weeks of gazing at a bare and forlorn landscape, spring finally came with a roar! Not to be outdone by its predecessor, spring almost broke its own records with a run of hot weather that inspired the early flowering trees and shrubs to bloom a couple of weeks ahead of schedule. I was disappointed to have missed the Yoshino Cherries (Prunus x yedoensis) and Weeping Cherries (Prunus subhirtella 'Pendula') in the gardens, which is further proof that the seasons move so fast, if you blink you might miss something. I was able to enjoy them from a distance driving through the countryside, at least. I have become excessively pro-Prunus, especially the cherries! A cherry tree blooming along with the Magnolias and Forsythia just screams "Spring!"
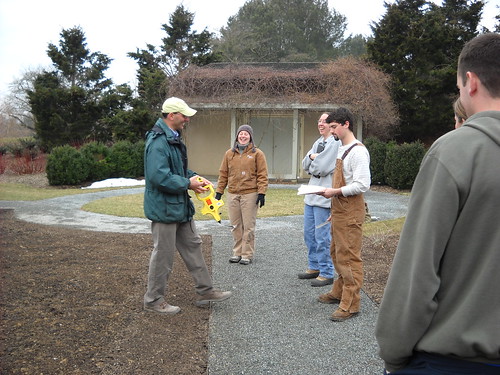
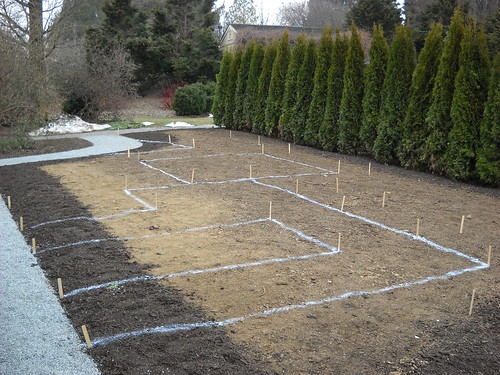
The arrival of spring also meant that breaking ground in our display gardens could finally take place. The snow had melted, the rains had eased, and we were able to make some real progress. While still in our Landscape Construction class at the end of March, we took advantage of one chilly but dry day to mark out construction lines on the ground. Our instructor, Dan, worked with us as each team measured, staked, and marked out the hardscape areas in our plots. Once the areas were marked, excavation could begin (when the weather chose to cooperate, which it didn't).
In a permanent garden, a path or step-in area such as ours would be excavated much deeper than our shallow 3" and built with a base layer under the gravel. Since these gardens are temporary and will be dismantled in about six months, we're able to get away with a few short cuts. We did go deeper than 3" since the edging measures about 5" in width, backfilled a bit and raked it smooth, then cut the geotextile to fit, poured in the gravel and voila!

With the hardscape complete, the next step is installing our hard goods elements. We're having some arches custom built, and are in the process of procuring the other elements from commercial suppliers. Following that step, we can begin planting! Landscaping on the east coast is so different from what I'm used to on the west - when our first shipment of plants arrived (Calamintha 'White Cloud') I helped off-load them and was somewhat shocked to see 62 pots with nothing but sticks sticking out! We gave them a cozy home in the student greenhouse and they came to life - to my relief - very quickly!
With a self-imposed installation deadline of May 15, we have just a few more weeks of work. The goal is to have the gardens installed at least two weeks before we depart for Spain. While we're gone, the Class of 2011 will oversee maintenance of the gardens. Next year it'll be their turn to mentor and teach the new Class of 2012 when the process starts all over again!
This project isn't just about building a display garden, though. We were also involved in the process of giving the entire space a name. In class we took an hour or so to brainstorm ideas to submit to the marketing folks. As we called out words and phrases that popped up in our minds, Dan wrote them on the board.
I know I am!
The arrival of spring also meant that breaking ground in our display gardens could finally take place. The snow had melted, the rains had eased, and we were able to make some real progress. While still in our Landscape Construction class at the end of March, we took advantage of one chilly but dry day to mark out construction lines on the ground. Our instructor, Dan, worked with us as each team measured, staked, and marked out the hardscape areas in our plots. Once the areas were marked, excavation could begin (when the weather chose to cooperate, which it didn't).
 Once the construction of the space was complete, each plot was graded and a ribbon of mulch laid around the perimeter to prevent soil from running off. This is our plot, ready for marking. Take note of the deciduous shrubs to the right.
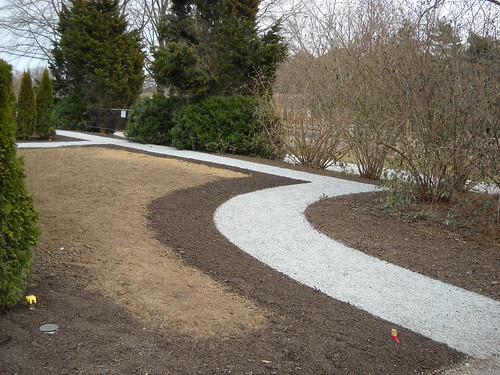 Alterations in the drawing from the copy machine and ever-so-scanty changes in the dimensions of the actual site may require some adjustment of the design to fit the space. Some of our classmates had discrepancies of several inches that they had to deal with. We were lucky - our measurements differed by a whopping half-inch!
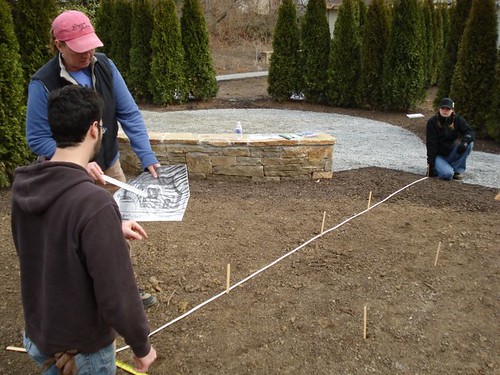
Here all the lines have been drawn and the hardscape areas begin to take on life and form.
 In even high-pressure situations it's good to have some levity!
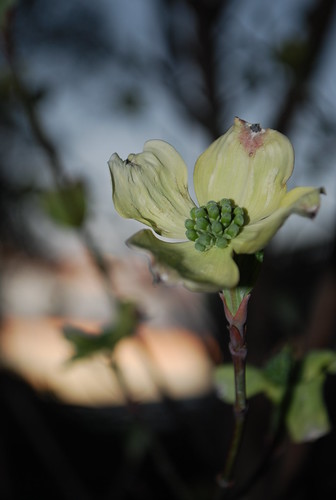
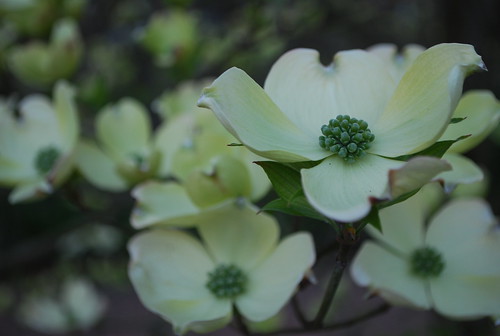
 The next step was to excavate the hardscape areas, install the steel edging, geotextile (otherwise known as weed-barrier fabric), and gravel. Ours is the only design of the four that doesn't have a path through the garden; we designed ours with step-in areas instead, so the visitors will still be able to interact with the garden without actually walking through it. For this reason we chose to use the same gravel as the existing path, which is sold in the trade as "rice chips". Remember those shrubs? They're Viburnum, now in full bloom!
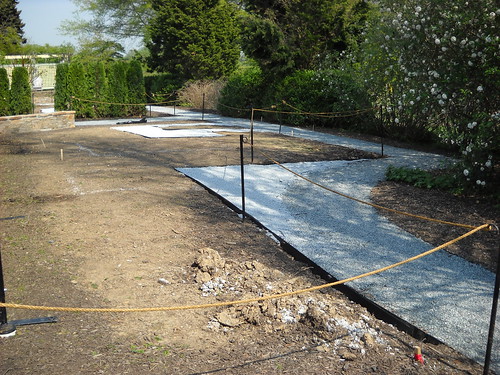
In a permanent garden, a path or step-in area such as ours would be excavated much deeper than our shallow 3" and built with a base layer under the gravel. Since these gardens are temporary and will be dismantled in about six months, we're able to get away with a few short cuts. We did go deeper than 3" since the edging measures about 5" in width, backfilled a bit and raked it smooth, then cut the geotextile to fit, poured in the gravel and voila!
With the hardscape complete, the next step is installing our hard goods elements. We're having some arches custom built, and are in the process of procuring the other elements from commercial suppliers. Following that step, we can begin planting! Landscaping on the east coast is so different from what I'm used to on the west - when our first shipment of plants arrived (Calamintha 'White Cloud') I helped off-load them and was somewhat shocked to see 62 pots with nothing but sticks sticking out! We gave them a cozy home in the student greenhouse and they came to life - to my relief - very quickly!
With a self-imposed installation deadline of May 15, we have just a few more weeks of work. The goal is to have the gardens installed at least two weeks before we depart for Spain. While we're gone, the Class of 2011 will oversee maintenance of the gardens. Next year it'll be their turn to mentor and teach the new Class of 2012 when the process starts all over again!
This project isn't just about building a display garden, though. We were also involved in the process of giving the entire space a name. In class we took an hour or so to brainstorm ideas to submit to the marketing folks. As we called out words and phrases that popped up in our minds, Dan wrote them on the board.

I know I am!
10 April 2010
Making Scents
A few years ago at the LA Flower Show, an enthusiastic rep from a rose breeder was trying to entice show-goers to experience the fragrance of his roses. His call of "put your nose in and give it a snort!" was effective and memorable.
This weekend, visitors will do well with just a demure sniff, as Longwood debuts it's first major exhibit, Making Scents: The Art and Passion of Fragrance. Actually, if you have keen olfactory senses, all you really have to do is inhale. The conservatory has been transformed into a horticultural parfumerie with scented spring blooms and flowering shrubs wafting their fragrance into the air and making you feel as if you've stepped into a bottle of pricey perfume! And in the gardens, blooming bulbs and trees offer their own aura to the spring air.
The exhibit has been three years in the making. When our Director, Paul Redman, discovered that a perfume company has been collecting the scent of Longwood's flowers for years, developing the concepts behind this exhibit were put into motion. We were treated to a preview (and delicious snacks) in the Ballroom yesterday. Check out this video about the exhibit and stay tuned for more photos of fragrant flowers.
03 April 2010
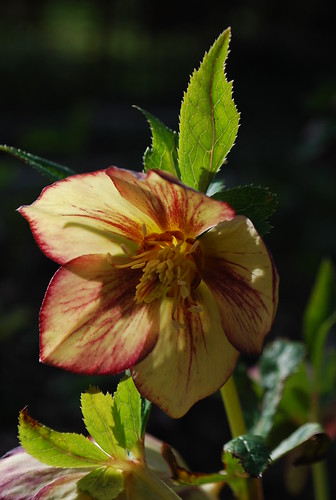
Hellebore Heaven
When you're a student at Longwood Gardens one of the innumerable delights of spring is the opportunity to visit local gardens, both public and private. One of my favorites is the garden of David Culp at Brandywine Cottage. David specializes in the genus Helleborus, hybridizing new cultivars from his garden and cultivating natural crosses to breed selections that are a beautiful addition to the late winter garden. After years of trials he is able to select the best of the best and this year is offering a line called Brandywine Hybrids™. His website offers an amazing photo gallery and information about the Hellebores he grows.
David has been helping his garden evolve for 20 years. It's a small garden - less than two acres - and is one of the most comfortable, enchanting gardens I've had the fortune to visit. The cottage itself dates back to the 18th century and was once a blacksmith's home and shop. When he bought the property, David decided to create a garden that complimented the history of the house. The garden is equal parts south-facing slope and level ground, on which he created a haven for Hellebores as well as a vegetable garden, trial beds, and areas for relaxing.
The main entrance to the cottage was originally to the south but has been changed to the west and features a charming brick patio and the original well that looks like something out of a story book.
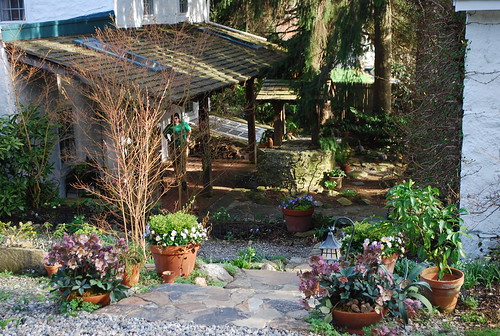
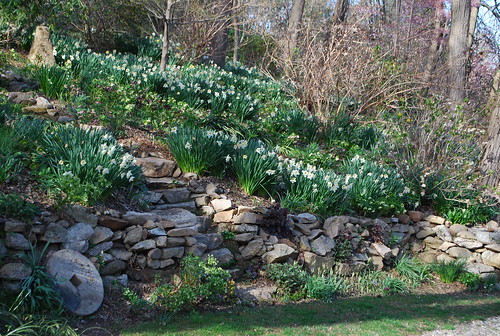
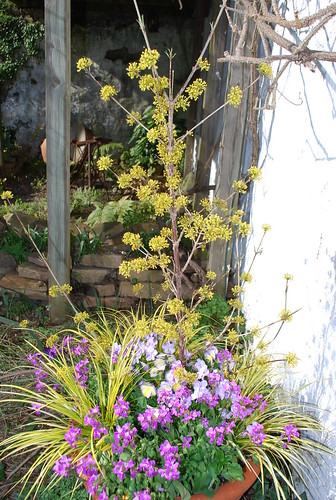
David's passion for horticulture is evident not only in his conversation but in his garden. An avid collector, there is even a Leucojum named after him which he discovered in the UK. Container plantings are everywhere and he insists on four seasons of interest. Along with the Hellebores, we enjoyed the drifts of daffodils, tulips, snow flakes, corydalis, scilla, and other floral delights that any gardener - and non-gardener - would give their green thumb to have!
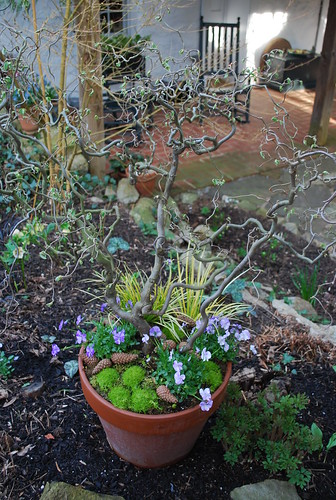
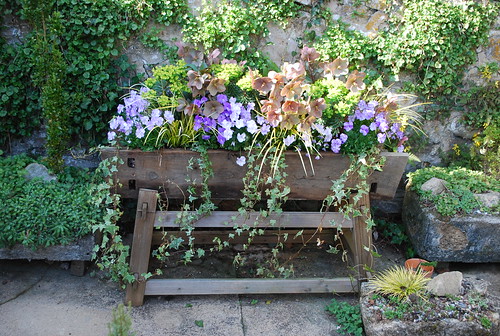
One of my favorite rooms in the garden is the Rock Garden, planted with hardy perennials, succulents, and containers. This hand-made wood trough overflows with Hellebore, Euphorbia, Pansies, Carex, and trailing ivy.
On the gravel car port, species tulips have been planted and allowed to naturalize. Their locations are marked by these jaunty Violas.


While giving us a tour of his trial grounds, David shared the standards with which he chooses and judges a Hellebore before it's made available in the trade. The sepals - the parts that actually give a Hellebore its color - should be evenly spaced. Most commonly there are five sepals but some cultivars are considered "doubles" and have ten or more.
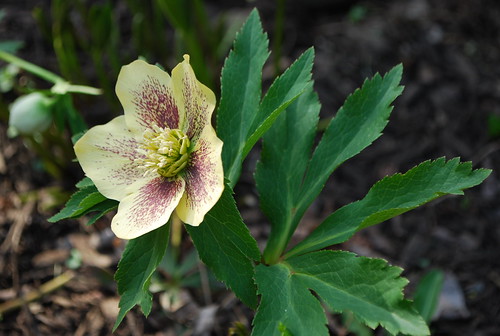
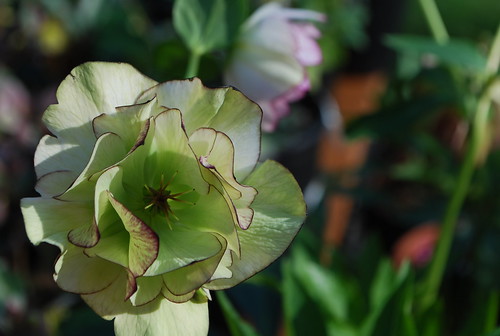
Another desirable characteristic is a short pedicel. The longer the pedicel, the more the flower droops. You don't want droopy flowers, but neither do you want upward-facing flowers. Wind, rain, and snow will damage the flowers and nectaries in blooms that have their faces up. Flowers with a slight nod that sort of look you in the eye are more protected, therefore a Hellebore that looks at you coyly is most pleasing!
 Indeed, the whole garden is a pleasure to behold and every corner is so artistically arranged that you feel as if you're in a magazine. If you ever have the chance to hear David speak you will recognize him instantly as one who has a passion for plants and who gains equal enjoyment from working with them as he does from sharing his enthusiasm with others!
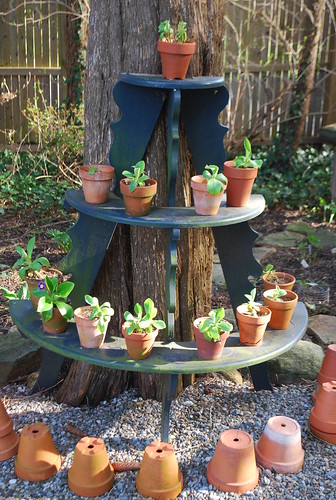

Subscribe to:
Posts (Atom)